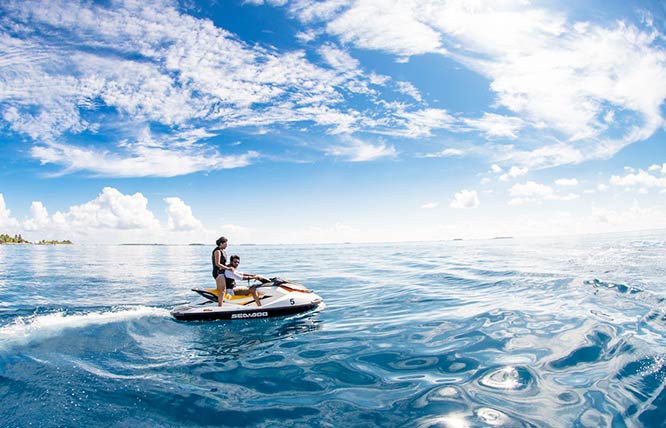
When we buy a new boat or personal watercraft, our imagination dances with possibilities as we plan to use our new toy every single weekend.
And then, inevitably, life gets in the way. Next weekend sometimes becomes next month before you know it.
One of the very best things you can do for the long life of your Sea-Doo is to establish a habit of undertaking just a handful of simple tasks after each and every ride, ensuring that it’ll be right and ready for your next ride – whether that comes in just days, or takes weeks.
Contents
1. Wash down the hull inside and out.
1. Wash down the hull inside and out.
This is particularly important if you’ve been riding in salt water.
Drain plugs for the hull should be removed after every ride, then reinstalled after the hull is largely clear of the water. They should also be removed during the washing process. Some owners will leave them out until the next ride, but I’ve learned the hard way that it’s best to replace them as part of the process.
(It’s not much fun to be miles from shore when you remember that you forgot!)
Warning: Always make sure your engine has cooled to ambient temperatures before washing the engine area. Spraying cold water on an uncovered hot engine could result in serious damage!
Washing first with soap and water and then rinsing will remove not only salt water residue, but also algae and other sediment that can be found in even the freshest of fresh water. Take care to clean out areas like the fuel tank, motor and jet pump areas, and all storage tubs along with the seat.
A mild dishwashing soap, or something specially formulated for washing your car, are solid choices for the soap to use. Avoid anything stronger or infused with detergents or solvents.
Also, be wary of the “shiny stuff” such as Armor All and the like on any control service, very much including the seat. These kinds of products can be extremely slippery and impede your control of the vehicle.
Avoid spraying the water directly into the fuel breather, air intake, coils, and other electrical components. These items are designed to live a long life in a wet environment, but not to be hit with 1200 psi at your local car wash. In fact, keep the high pressure washers away from your PWC altogether. Low pressure is the way to go.
Those same areas should then be coated with an anti-corrosive lubricant like Sea-Doo’s own proprietary spray or equivalents like CRC’s multi-purpose lube or Fluid Film.
Finally, though it’s hardly part of my own weekly regime, periodic application of a quality marine wax can do wonders for keeping your hull’s appearance in tip top shape. Should you choose to apply a light coat of wax, save that for the last step before storing your craft.
2. Flush the jet pump, exhaust, and cooling system.
This is absolutely essential if you’ve been riding in salt water to keep corrosion at bay, but is also strongly recommended even for fresh water users.
Irrespective of operation in fresh or saltwater, you always want to flush your ski, every time. A proper flush treatment removes not only salt, but also the sand, algae, and weeds that are found in virtually any body of water.
Exhaust system flushing should be performed each time you are done for the day. It’s easy enough to assume that everything is fine, as you’ll be riding again by next weekend. But again, life can get in the way. Maybe you won’t. Best to just take this step after every ride is completed.
First, when flushing the engine, make sure that your jet ski is in a level position.
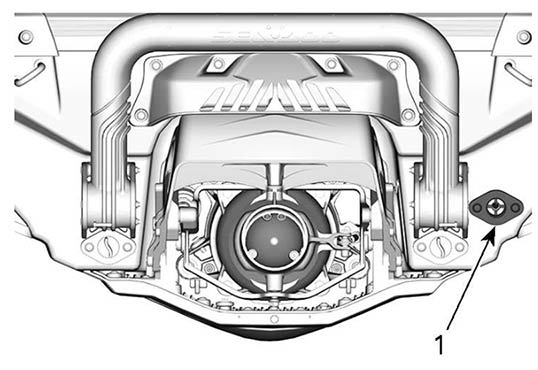
Next, connect your garden hose to the inlet located to the side of the jet pump at the back of the hull. DO NOT turn the water on before starting the engine.
Second, start the engine, and then immediately turn the water faucet on to allow fluid to both clean and cool your system. Never run your Sea-Doo’s engine for more than a few seconds when supplying water to the exhaust system when the watercraft is out of the water.
Run the engine for about 90 seconds at idle, and never longer than two minutes. Note that even with a flush hose connected, your drive line seal has no cooling when the watercraft is not in the water.
Check to ensure that water is flowing out of the jet pump. Then, close the water tap and very briefly run the engine up to approximately 5000 RPM for five seconds or so. Stop the engine.
It is vital that you start the engine, and then the water flow – and then reverse the order by closing off the water feed before stopping the engine. Confusing the order of these steps could force water into your engine cavities through the exhaust system. This will lead to grievous damage and huge repair bills.
Finally, disconnect the hose. You’re done with this step, just that quickly and easily.
3. Inspection of hull and driveline
Modern watercraft are remarkably well engineered and resilient, but as with any vehicle, use over time will entail an unavoidable element of wear and tear.
The best way to keep diminishing returns at bay is to thoroughly inspect the craft and its components after each and every use, dealing with any small problems before they grow into large ones.
Although you check the oil before every ride – you do, right? – now is the time to recheck the level and condition of the oil. Make sure it is up to spec.
Have a good look at all fuel lines and connections, making sure there is no tell tale drips or fluid.
Run both your eyes and your hands over the hull, checking for any signs of damage or delamination. Any cracks or signs of damage in the fiberglass should be checked by a professional. Riding a watercraft with hull damage will put your interior components in serious danger of more significant damage.
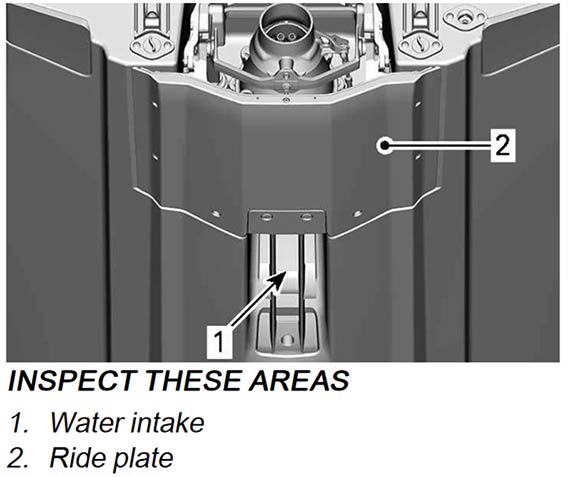
Finally, inspect the ride plate area and intake grate for any damage or debris. Have a look inside the outer nozzle of the jet pump to ensure that there is no debris or foreign elements present.
Sea-Doo Storage Ideas
A final note is that Sea-Doo watercraft are meant to be ridden in the water, but not stored in the water.
Though many keep their personal watercraft tethered to a dock, we’d very much recommend the vehicle be removed and either left on its trailer or transferred to a dedicated watercraft dolly.
Storage within a climate controlled garage is ideal. If that’s not possible, certainly invest in a quality cover as long term exposure to sunshine and other elements can make your once shiny and new toy turn dull in appearance in relatively short order.
Related: How to Winterize your Jet Ski for Vehicle Storage
Ready to ride another day
There’s really not very much to it. Wash, lubricate, flush, inspect, and cover.
Make it a habit. Don’t skip it.
Just 15-20 minutes after each ride is one of the best investments you’ll ever make – beyond choosing to get in on the fun and purchasing a Sea-Doo in the first place!
Related posts:
 5 Awesome Jet Ski Races in the US 2022
  How to Find the Best Jet Ski Dealer [Ultimate Guide]
  Fishing from a Jet Ski: Safety Tips That Could Save Your Life!
  Best Bargains: Sea-Doo Spark and GTI, Yamaha EX, and Kawasaki STX
  Might As Well Jump: Jet Ski Wave Jumping 101
  To successfully deal with the Yamaha FX Fuel gauge problem [Video]