Today’s four-stroke powered personal watercraft are as painless and trouble free to operate as your family car. Just gas and go for your turn-key toy, right?
Well… mostly.
The difference is wintertime for those who live in colder climates.
Few garage their four-wheeled vehicle when freezing temperatures arrive, and it’s easy to overlook that everyday operation is its own form of maintenance.
If you live in an area that precludes year-round use, it’s important to know the ins and outs – and the costs – of seasonal storage.
Contents
What needs to be done? And by who?
While it’s a relatively minor expense compared to the price of initial ownership, newcomers to the personal watercraft lifestyle might be surprised how quickly the costs of winterizing a jet ski can add up.
The simplest solution – commissioning your dealer to do the work – is also costly. You can pay well over $700 on average to have winterizing procedures performed by professionals.
Happily enough – at least for those who are comfortable performing their own maintenance – preparing a PWC for storage can be an investment in time that will save you a great deal of money.
Depending upon just which model of personal watercraft you own, performing your own winterization could easily cost only about $100 or so, sometimes even less.
It’s not complicated to winterize your own jet ski
While there are certain supplies that are required either way, the far larger part of a dealership shop bill will be found in the labor column. And while you are paying for the expertise as well as the time, it’s mostly the latter that goes into winterizing a jet ski.
The steps that need to be taken are not complicated or beyond the reach of most. It’s time consuming, but not difficult, and the cost savings will be exponential. So if you’re willing to roll up your sleeves and take the task on yourself, here’s what you’ll need to know.
Removing (and sometimes replacing) coolant
First up in the laundry list of procedures will be to drain all the water from the cooling system.
With one exception, manufacturers of personal watercraft use an open-loop cooling system. Effectively, you are floating in your radiator, with the engine drawing its coolant from the very waters you navigate.
This is extremely efficient, and in one sense continually flushes your cooling system. However, and it’s a large caveat depending on where you tend to ride, the quality of that water can vary tremendously and have lasting effects on the reliability and longevity of your machine.
Salt water is extremely corrosive, and brackish water can be even worse. It is strongly recommended that a jet ski be flushed with fresh water after every salt water use, and the sooner the better.
Even freshwater often contains algae, debris, and other contaminants that make this a very good idea for inland users as well.
When it comes to winter, no water should be left in the system. After hooking your flush kit to the hose, run the machine for the prescribed time before shutting off the water flow and letting the motor run for just a bit longer to expel what liquid remains.
How to do a Coolant Flush on a Sea-Doo
Any fluid left inside during harsher winter months could freeze and potentially wreak severe damage to your engine and cooling components.
Sea-Doo machines are the exception, as Bombardier has employed closed-loop systems for 20 years now, having introduced the technology in 2002 with its four-stroke designs.
Closed-loop cooling as used by Sea-Doo is mostly analogous to the coolant in an automobile – it circulates internally, uses anti-freeze as a component, and the water you ride in and the water within your motor never mix.
They do meet, however, at the ride plate beneath the hull. With Sea-Doo’s design, the ride plate effectively functions as the radiator, with hotter internal coolant being cooled by the water being navigated.
This isn’t a get out of jail free card for Sea-Doo owners, however. While the engine is cooled internally, the engine intercooler and its exhaust system are still cooled by external water.
Thus, even with a closed-loop system, the intercooler and exhaust coolant lines should still be flushed with antifreeze when winterizing.
With Sea-Doo’s closed-loop design, it’s important that the antifreeze contains the necessary additives to prevent both corrosion and cavitation within the coolant system. The correct dilution is also essential.
The safest way to ensure your mixture is correct is to simply use Sea-Doo’s own premixed coolant – affordable enough, and with the added benefit of the proprietary antifreeze being formulated as a long-life five-year replacement for cooling systems that require a two-year coolant. (Note that while the Sea-Doo premix is sold by the gallon, larger machines with the 4-TEC Rotax engine require five quarts, while the smaller Spark powerplant requires just 3.2 quarts. Consult your owner’s manual or your dealer for your correct coolant system capacity.)
Recommended reading: Sea Doo Maintenance Guide
Flush Jet Ski With Antifreeze
For owners of open-loop personal watercraft, i.e. anything not a Sea-Doo, it matters little what antifreeze is used as we are merely flushing the system. Any discount brand will do.
It’s simple. Mix antifreeze and water in a 50-50 solution in a bucket. Then place your hose in the flush outlet on the end with the other dipped into the solution. Turn the engine on and off until the mixture has passed through the system.
For best results, particularly in clearing all liquids from the water box in the exhaust, tip the bow of your watercraft up in the air to lower the stern.
Overlooked Oil
Oft ignored by watercraft owners is the advantage of changing engine oil before storage for the off-season.
Air includes a component of moisture. By definition, personal watercraft are operated in a wet environment, making that moisture content greater.
When an engine is warmed up, that moisture within the air inside the crankcase condenses into a liquid form and is carried by the motor oil throughout the motor.
As the engine warms up, moisture in the air inside the crankcase condenses into liquid form on the cold internal engine parts, and the motor oil carries this liquid throughout the engine.
This occurs in an automobile or any engine on land, and is that much more prevalent in vehicles operated on the water. It’s a bit of a non-factor for your car when operated regularly. But when a watercraft is stored for a long period of time, it becomes a cause for concern.
For those confident in performing their own labor, this will be the most expensive part of your winterization tab. Not to worry, we’re still just talking tens of dollars, not hundreds. A gallon of personal watercraft oil will run in the neighborhood for $20-40.
The major manufacturers all offer their own excellent proprietary brands, such as Yamalube, but we can also confidently recommend Motul or Maxima watercraft oil.
There is one other cost factor, but it too is minor. As it would obviously be quite the mess within the hull if the oil is drained via a plug located in the sump, you’ll want to pump the old oil out.
This can be accomplished for less than 10 dollars with a removal pump from somewhere like Harbor Freight, or more easily with a somewhat better unit like this one available on Amazon for just a bit more.
Yes, an oil change before storage adds to the short-term costs. But it’s a solid move for long-term ownership as well as easily accomplished by anyone with the slightest mechanical inclination.
Still more liquid concerns
Finally, with coolant systems and engine oil addressed, there is also the all-important aspect of fuel.
The detrimental effect of ethanol-based fuels on the components of an internal combustion engine is another article altogether, and is well documented.
But again, these factors become exponentially more important in a storage situation.
Most watercraft owners will experience no short time ill effects from running on commonly available pump gas during the riding season, but it’s strongly encouraged that the last fuel fill-up of the year is alcohol free.
Ideally, one could drain a fuel tank entirely for storage – but that’s hardly practical for most. The easier alternative is to fill your tank with a good grade of non-ethanol fuel. Filling the tank reduces air volume, and the less air volume remaining in your tank, the less moisture will accumulate.
A quality fuel stabilizing additive is also recommended. After adding a stabilizer, run the engine briefly to distribute it throughout the fuel system.
Watercraft manufacturers offer variations on fuel stabilizers such as the excellent Yamalube products, and more commonly available products like STA-BIL are also a good choice.
Lubricate all pivot points and some exterior surfaces
Seals and control cables are normal wear items, but much of that wear and tear can be prevented with proper lubrication. This should be done periodically throughout the summer, but becomes imperative before storage for winter.
For seals and control cables, commonly available lubricants designed to displace water are sufficient protection.
Finally, engines should be prepped for being put away with fogging oil. These products are designed to prevent interior corrosion. The oil is simply sprayed into the air intake while the engine is running, which will largely distribute the lubrication.
Again, Yamalube and STA-BIL, among others, offer products specific to the task.
Many models will feature small plastic caps in the spark arrestor cover to facilitate fogging, or you may have to remove the cover. Be very careful that nothing is dropped – you don’t want anything entering your intake system other than air or fogging oil designed expressly for the task at hand.
A solid second step afterward is to remove each spark plug and fog the cylinders themselves individually. With the plug out, spray the fogging oil directly inside. Cover the spark plug hole with a rag and bump the starter to spread the oil in the cylinder.
Reinstall the spark plugs.
Battery care
If you are able to store your watercraft for the winter in a climate-controlled garage, you can likely get away with simply connecting your battery to a quality trickle charger such as a Battery Tender.
Conversely, if the watercraft is to be stored outside you’ll want to consider removing the battery altogether. That’s especially the case if the battery in your watercraft is a traditional lead-acid pack.
If your battery is a more modern sealed AGM (Absorbed Glass Mat) battery, it’s likely that you’ll experience no issues with leaving it in place.
In either event, disconnecting the negative cable is recommended.
Wash and dry
Some begin with this step, others prefer to leave it until the end. The hull of your watercraft should be thoroughly cleaned both inside and out.
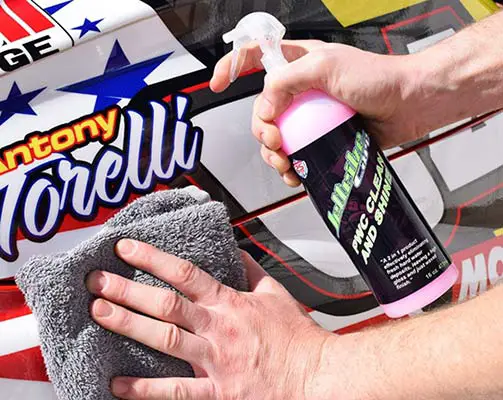
Most mold, mildew, or even grime can be easily removed with a simple formula of mixing water with about 10 percent common household bleach. Use a generic spray bottle, or pump sprayer, and spread the mixture liberally inside and out.
Let the mix sit briefly, and then rinse, taking care to make sure all bleach is flushed away. This will likely suffice, but give your craft a good visual inspection and make a second pass with a nylon brush at any discolored or still-dirty areas.
Rinse and repeat. Perhaps needless to say, avoid inhaling bleach fumes and wear old clothes. Dishwashing gloves are also a good idea.
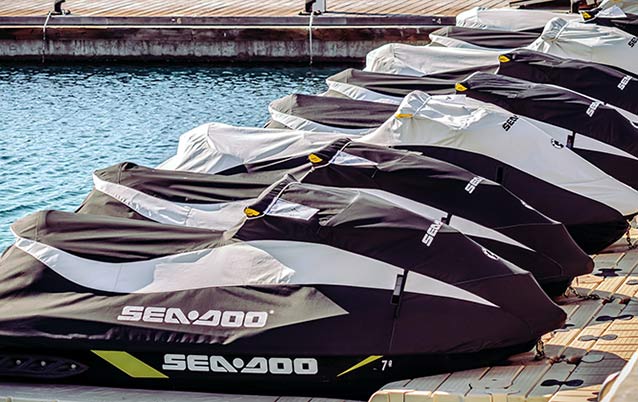
Leave your watercraft tipped up at the front if possible, let it dry completely, and install a quality watercraft cover. It’s also a good idea to leave the seat unlatched.
Wrapping up
The cost of a fresh tank of fuel – and perhaps fresh engine oil – aside, winterizing a jet ski can be quite affordable.
If you’re confident in your ability to perform the above procedures in your driveway, there’s little reason to spend hundreds of dollars at your dealership.
Winterizing your personal watercraft is one of the best long-term investments you can make in both the performance and longevity of the machine, ensuring that its components remain undamaged and as near-as-new.
It’s arguably the most important thing you can do to save yourself both maintenance and repair costs in the long run!
Related posts:
 5 Awesome Jet Ski Races in the US 2022
  How to Find the Best Jet Ski Dealer [Ultimate Guide]
  Fishing from a Jet Ski: Safety Tips That Could Save Your Life!
  Best Bargains: Sea-Doo Spark and GTI, Yamaha EX, and Kawasaki STX
  Might As Well Jump: Jet Ski Wave Jumping 101
  To successfully deal with the Yamaha FX Fuel gauge problem [Video]