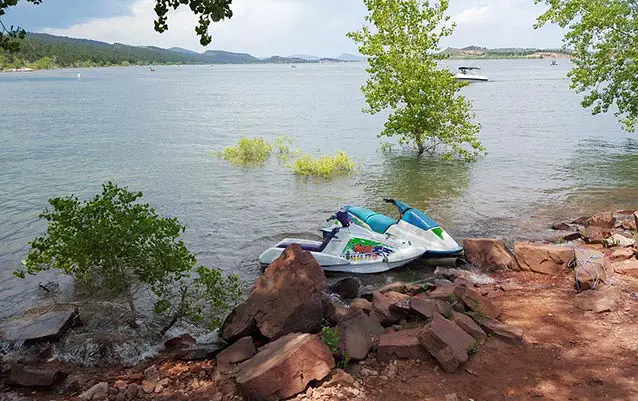
Scratching the underside of a Jet Ski is basically inevitable. If you’re going to ride it, you are going to mar that pristine glossy showroom finish.
We beach our personal watercraft. We might occasionally skim over a log – or worse, hit a stump that is below the visible surface of the water. Even trailering a PWC can result in scratches in the hull from the trailer’s bunk rails.
There are any number of ways in which we compromise the shiny surface of our favorite mount, and if you’ve never done it, you’re in a minority of the fortunate few.
Not to worry. With minimal financial investment and just a bit more elbow grease, we can fix it up.
Contents
The Case for White
There is something to be said for a basic white hull on a personal watercraft.
And that something is that they don’t show scratches and gouges like all these boats offered in such a lovely array of colors.
Matching colors is a tricky business. We’ll have some advice on the best approaches to achieving a reasonably convincing color match below.
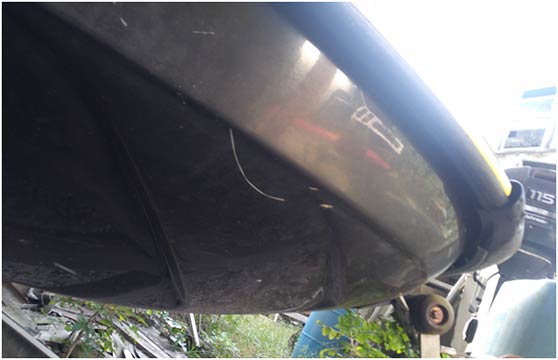
Gel Coat scratches are relatively easy
Oftentimes, the damage is more superficial than it looks and is limited to the surface of the gel coat.
Gel coat scratches can often be simply buffed out with a quality polishing compound such as Maguire’s or an equivalent.
Deeper scratches will require filling with a gel coat paste. This is not simply a matter of cosmetics. If the gel coat is genuinely damaged, you are at risk of water and other elements penetrating the ding or scratching and reaching the core hull material, which could eventually lead to your hull being compromised.
Your hull is either made of fiberglasses like traditional boat construction, or a composite material like Yamaha’s NanoXcel material. In either case, the structure is covered with a hard layer of resin that seals your hull with its finish, and the treatment for surface scratches remains the same.
When working on scratches that are limited to this gel coat, one has to be wary of making a small problem into a larger one. Aggressive sanding to smooth the surface will further damage the gel coat.
There are a vast number of gel coat repair kits available from many manufacturers. These kits provide both filler and finish, and some will include various colors that can be mixed to produce an approximate match to your Jet Ski’s finish.
Small Gel Coat Repair Kits
Repair kits consist of a gel coat paste, a hardening agent, and sealing film. Color repair kits will also include a selection of different color pigments and mixing sticks.
Gel coat repair kits are widely available and roughly equivalent to one another in my experience. I’d recommend one specifically if I felt strongly about it, but I’ve used dozens and they are all about the same. They can be found at your local dealership, marine supply shops, some home improvement stores, many paint supply stores, and all over the interwebs.
What you’ll need to provide beyond that is a flexible plastic spreader and several sheets of wet-or-dry sandpaper in various grits ranging from 100 grit to 600 grit. And a scraper of some sort, to ensure the new gel coat will adhere properly to the surface.
How to repair hull gouges in 6 steps
1. The key to a quality finish is cleaning and preparing the surface to be repaired. Start off with a good hard bath with soapy water. Then, after washing, wipe down the affected area with acetone.
Again, you want to resist the urge to attempt to simply sand out scratches. This will further damage the gel coat, and you’ll only wind up duplicating your efforts later. Before sanding, let’s fill the scratches.
2. It’s folly to attempt to repair a scratch by just painting over it. Alas, the right way to do it is to make it worse! You’ll want to use the corner of a paint scraper, or a screwdriver, to open the scratch into sort of a V shape. This will allow the repair to properly adhere to the surface.
Pro tip: For deeper gouges, use a Dremel tool. A Dremel, if you don’t know, is a V-shaped rotary grinding bit powered by an electric motor or compressed air. Being careful not to get too deep, turn on the Dremel and hold the tip at a 45-degree angle along the gouge. Carefully remove any sharp edges. And yes, we just used derivations of the word “careful” in two successive sentences. That’s for emphasis. Don’t make it too much worse than it already is. Be careful. That’s three. Also, wear eye protection.
3. The rub is that gel coat resin is too thin to fill a scratch, while gel coat paste is too thick. You have to make a bit of room for the paste to properly fill the damaged area.
The kit’s hardener is your catalyst that sets the rosin into action. Generally, you’ll add about two percent of hardener to the resin by volume. Follow the manufacturer’s instructions. Be absolutely sure to stir and mix the two completely or you’ll compromise the repair. You’ll need to start applying the mix nearly immediately, as it will begin to harden within about 30 minutes.
4. When mixing the hardener into the rosin, wear gloves, safety glasses, and a face mask. The catalyst is generally highly toxic. You don’t want to breathe it or wear it on your skin.
Now, you’ll take the plastic spreader and begin working the mixture into the crack. The mix shrinks as it cures, so be sure to use enough. Conversely, you don’t want to use too much as you’ll just be adding to the bit you’ll be sanding off earlier. I’m making it sound harder than it is, but you will have to learn from your own experience how much is too much. Too much is better than too little, however.
5. Next, you’ll need to cover the repair with plastic film in order to let the gel coat fully cure. Most resin combinations won’t cure in the open air. Many kits will include this film, but a sandwich bag – or a similar plastic bag that is big enough – will suffice nicely. Smooth it over the surface of the repair and tape it down on all four sides completely to create an air-tight seal.
6. Now you can have a beer. Or several. Or mow the yard. However you want to kill the time, you’re done for the day. Some say 6 hours is long enough. I say allow the repair to cure for at least 24 hours. I’ve been around, I know a lot of people, I’ve ridden in a lot of waters, and I’ve damaged a few boats here and there. Your mileage may vary, but there’s nothing to lose by allowing your repair to set up and become truly permanent before tomorrow. You’re not going riding today.
When you return to it the next day, it’s time for the aforementioned elbow grease. Starting with 100 to 150 grit sandpaper, use a sanding block and smooth the bulging repaired area level with the surface while making every attempt to sand only the repair and not the hull itself.
When you are satisfied that all excess material has been removed, continue to wet sand the area with decreasing grits. As you move from something like 220-grit sandpaper to maybe 400 and then 800, keep the surface area wet and bring the repair as smooth and level as you can. This can be tricky in some spots – if the hull has particular curvature in the area you are repairing, take care not to remove or flatten the curve by eschewing the sanding block and using only your fingers. I recommend wearing gloves. Use a circular pattern as you go to finer and finer sandpaper.
Hopefully, you were able to achieve a satisfactory color match, and you are nearly done. Use a polishing compound – preferably with a buffer, but it can be done by hand with extra elbow grease – to remove any swirl marks from the sanding, then apply a fresh coat of wax to the repaired area.
Color Matching is an Art in Itself
Again, white is generally super easy by comparison. Still, though, even those who have toiled away in an automotive body repair shop for many years can struggle to approximate matching colors. It gets even more difficult when the color is a vibrant red, or green.
Unless your watercraft is essentially brand new, a factory color doesn’t often make for a perfect match. Exposure to the sun and even the water changes the color. Don’t think a dealer paint code ensures success – but it does make for a good starting point.
Though it’s not essential if you have a very good eye for color, I’d suggest visiting a local paint store before even beginning repairs with your boat in tow. Find a friendly enough employee to go outside and match the color of your hull as best he or she can with color sample cards and then mix you a small bit of paint that you can add to your resin. It is vital, by the way, to mix the color with the resin before adding the hardener.
You’ll still be the one in charge of adding the proper amount of color to the gel coat paste. Just add a few drops of color at a time until you feel you have approximated the correct color. Spoilers, it won’t be perfect.
Next time, be more careful and don’t scratch your boat. Ehh, it is ultimately inevitable. Don’t beat yourself up.
Still, even if the color match is not perfect, you’ll have done both yourself and your hull a favor by restoring the gel coat over the primary hull material. Not to worry. You’ll inevitably scratch it up again, and do a better job next time.
Related: Can you vinyl wrap a Jet Ski?
Do I need to worry about my hull’s material?
No. Gel coat repairs remain a constant whether your manufacturer – Sea-Doo and Kawasaki – use an essentially traditional fiberglass construction, or if you own one of the Yamaha models with a NanoXcel hull construction.
Gel coat is gel coat. This article concerns surface scratches that have marred the finish without actually compromising the integrity of your hull. If you’ve punched a huge gaping hole, you’re going to need real fiberglass repair.
For that, I’d largely recommend a professional. Fiberglass work isn’t particularly complicated, just itchy and bitchy. It’s a lot of work, but any chimp – who doesn’t mind itching, doesn’t think long sleeves and gloves work… seriously… I’ve been there – can lay fiberglass.
But not changing the profile of your hull in the process can be extremely difficult. It takes many years of experience to properly duplicate the subtle arcs of a 22.5-degree semi-V hull profile, and all the more so if the hole is located where chimes or strakes direct water beneath the hull surface.
Sometimes, it’s money well spent to have someone who does it every day do it, instead of doing it for the first time yourself.
Related posts:
 5 Most Insane Jet Skis in the World
  Sea-Doo Spark Jet Kart: the World’s First Go-Kart on the Water!
  Money-Saving Tips for Winterizing Your Jet Ski
  Eight Sea-Doo Issues – How to Address Them [Video]
  Jet Ski safety is your responsibility: Don’t play bumper boats!
 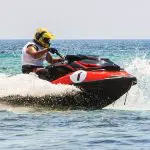 Sea Doo OPAS: Sort of rhymes with “Faux Pas”